Thursday, March 31, 2016

Hopping Mad


So, with an adult jumper project on the go, a baby blanket to make, a smock for my granddaughter to finish off, plus several fair isle items on various needles it seemed a perfect time to get obsessed with a new project!

I'm always looking for ways to use up the scraps of yarn that gather after projects are finished and these little bunnies provided the perfect opportunity to use up bits and bobs.


I found the patterns from this website, they are a little challenging to begin with, but as I'm now on bunny no. 3 - I think I'm getting the hang of it!


Esme the Easter Bunny

Bunny No2 already for her dress
Now, back to those other projects.......

Monday, March 14, 2016

Grab a cuppa and visit to the Shetland Museum & Archives

There I was on a snowy Saturday afternoon, working on my Gudrun Johnson Craftsy Class: The Shetland Hap Shawl and watching a live broadcast of a study day on knitting at the Shetland Museum!

You gotta love the internet!!

Its now available on their website and I can catch up on the morning talks that I missed:  http://www.shetlandmuseumandarchives.org.uk/collections/museum/textiles

Put the kettle on and join me for a fascinating tour of the Shetland traditions in knitting!


Going like the clappers - and other hot tips.

Whenever the washing pile and the ironing pile create a perfect storm - I think of my grannies.  Nan O'Toole was a tiny little thing with snow white hair and sparkly blue eyes who, when her husband had left her and their 9 children for another woman, took in other people's laundry to put food on the table.


No washing machine, just a boiler and a mangle.

My other granny was widowed young and left to care for four children.  She died when I was a baby but I've heard the stories of how hard she worked to lead her family out of difficult times.

Now, each time I process the laundry I connect with the old girls and say a quiet hello to the grannies and give thanks and appreciation for their grit - and am grateful for modern appliances!

Tailor's Clapper
Organza Pressing Cloth
I think they'd been highly amused at my new toys!  Can you guess what they are?

On the left is a square of organza cloth - perfect when you want to actually see what you are pressing but need to protect the fabric from the iron.

On the right is a Tailor's Clapper - an amazing device that my grandmothers' were no doubt very familiar with.  I'm not super confident with my sewing yet, but one thing I want to be able to achieve is a handmade rather than homemade look and, I'm reliably informed by my friend who's mother worked for a couturier, the secret is in the pressing!

The clapper gives a lovely finish as the wood absorbs the moisture from the steam and flattens the seams beautifully.

So, my dear grannies, your years of hard labour doing laundry has not been wasted on me!  I am a woman who appreciates the value of good laundry skills!

To see the clapper in action, here's a really helpful video from Didyoumakethat? There's lots of great info and inspiring posts on her blog, too.

Friday, March 4, 2016

The final piece: where I satisfyingly tick something off my to-do list!

So here's a story about an impulse purchases that took a loooong time to finalise. 

About two years ago, fresh into my creative journey, I bought some lovely silk jewel coloured yarn and started making granny squares with no particular idea of an outcome.

Son no2 liked the feel of the squares - soft and silky - so I decided I'd make him a cushion.  I felt that an old jumper would be perfect for the back cover and daughter No2 pulled out one that had sat in a rather large pile in her wardrobe for a couple of years that had perfect colours to match   Sorted.
I finished the squares quite quickly and then promptly forgot about them.  

My to-do list keeps growing and I am getting almost uncontrollable yarn-purchasing urges so I decided that I needed to at least purge my stash and see what needed finishing before adding more exciting projects (and yarn) to the list!  

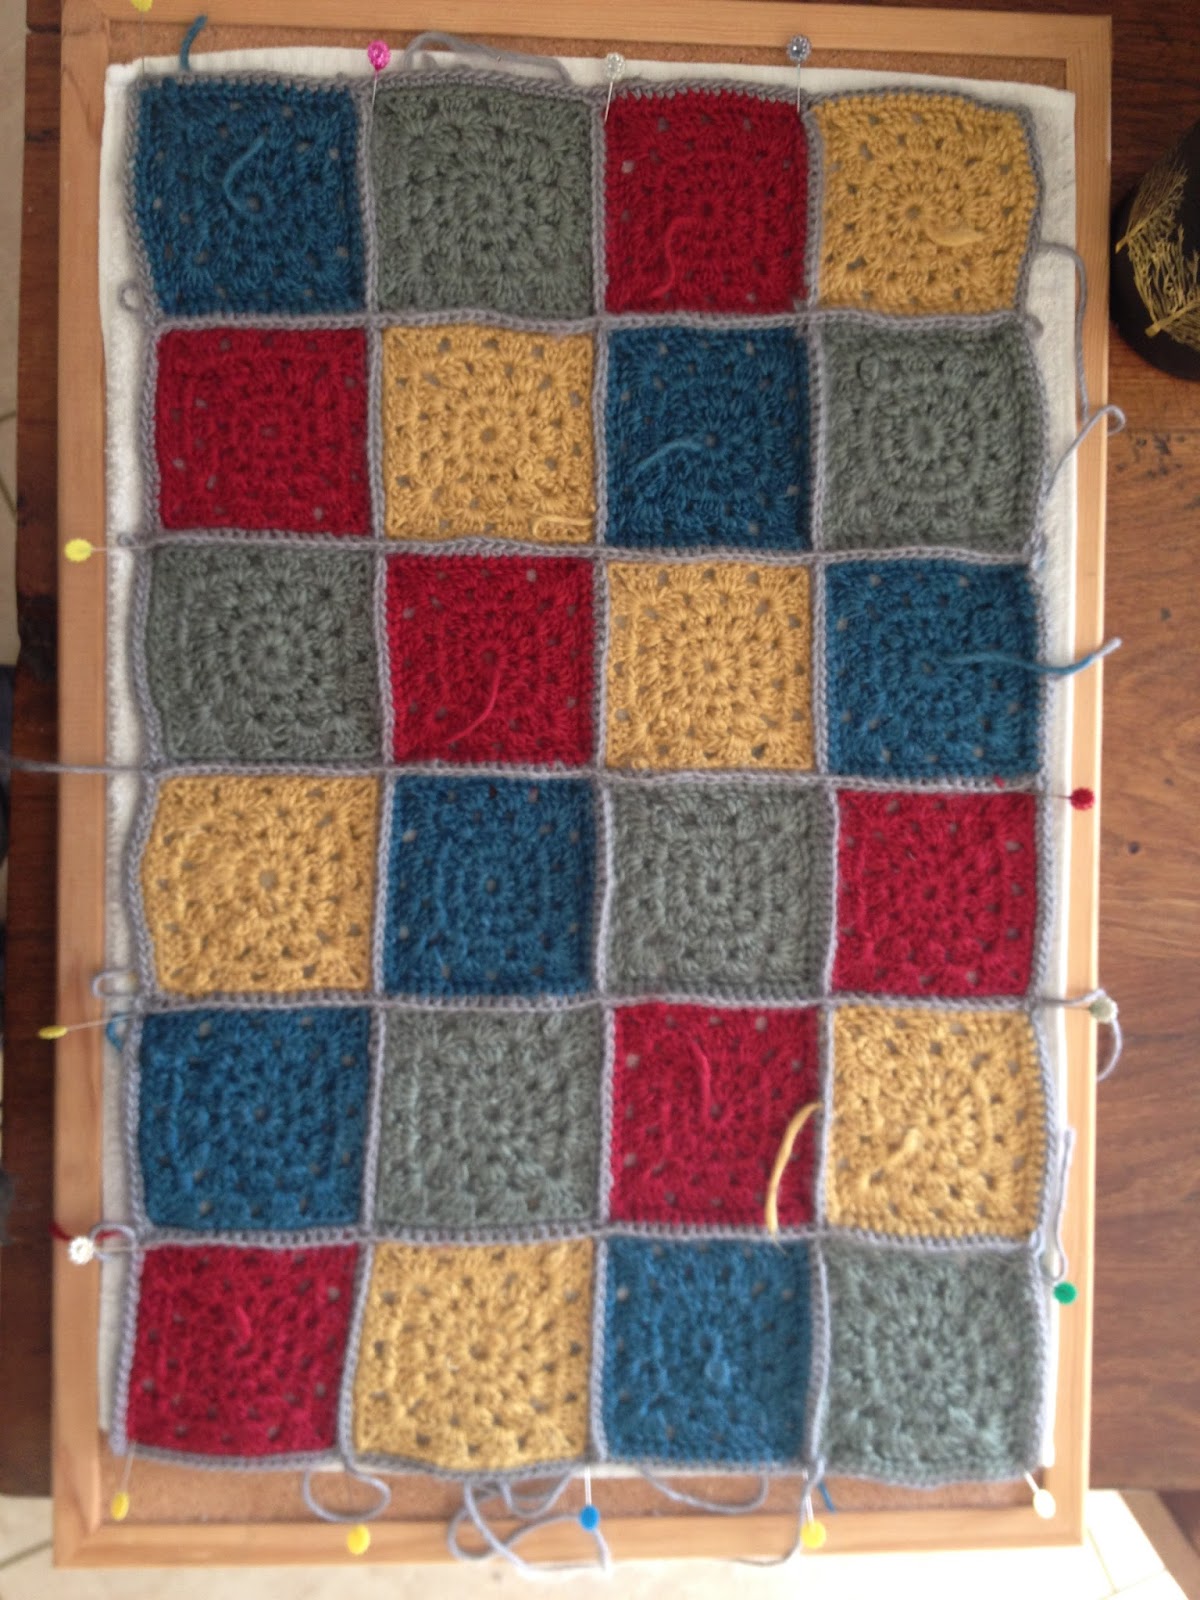
I found the squares and spent a few evenings crocheting them together, tidying up the ends and blocking it out to get it straight-ish.

All together now
I was ruminating on what had taken me so long to finish this project and realised it is the same old thing - fear of getting it wrong.  As I was going through the process of cutting up the jumper and sewing it all together I could hear myself worrying about the finish, about making a mistake, about how it would look. 

My goal with Fashionably Slow is to establish a hand-crafted life, making as much clothing, food, cleaning products, gifts and stuff as I can from scratch.  Keeping the process as simple and as gentle to the environment as possible. 

I've realised that means being kind to myself too - otherwise it will just become Fashionably Slow Torture!

Cuddly Jumper Side

Silky Square Side

Mood Shot!


Tuesday, February 23, 2016

What's needling me?

This blog is called Fashionably Slow for a reason....it takes time for me to get to it!!

Even though I haven't posted for a while - I haven't been lazy.  (And my blog silence has nothing to do with the fact that I may have forgotten my password for a few weeks and finally found it written down in my trusty 'password log book'.  On my desk.  In front of my nose.)

Family Heirloom in progress
Anyway.  Passion craft of the moment is definitely knitting and in true knit addict fashion, I currently have several projects on the go at once.  

Even though I love making the year-long- family heirloom-Fair Isle blanket, I have already fallen behind.  The pattern for Month 5 just arrived in the post and I am barely through Month 2. 

This project requires quite a big amount of 'head space' for me.  No talking, no radio, no tv...just quiet focus which I haven't had recently, but I feel a big wave of Fair Isle coming on..... I'll show you the cunning plan I have devised to help me better manage this project at a later date.

Getting to know the process
Knit by Numbers
In the meantime I've been working on a simple hat pattern from a brilliant blog The Craft Sessions.  This blog is a lovely place to hang out and the hat pattern Felicia posted is a great way to use up old yarn, plus I'm learning to understand the basics of construction, gauge and tension with her pattern.  

Its a quick hat to knit and I'm using the glorious Knit by Numbers, which feels so lovely on the needles.  This was the second hat I've made (my 'dog walking' hat supply is growing- as are my donations to an inspiring charity KnitAid) and now I'm ready to construct one for Son No1.  He wants his with a slightly longer rib and a longer body of hat for a slouchy shape and, I'm delighted to say, I now know how to do that.
Getting the plan together

One of my goals this year is to knit my own jumper.

I am so lucky to have a fabulous local yarn shop nearby with a great visiting teacher.  Fiona Morris is an experienced, very patient teacher and extremely generous with her time, knowledge and skills.

Whilst knitting baby garments has developed my skills and techniques I wanted to understand how to create a good fit - and to learn more about gauge and tension.  So I am doing a 'Knit Your Own Jumper' course with Fiona and learning the skills needed to create adult jumpers that actually fit.

Using a basic pattern we have custom built our jumper designs and over the next two months will create our own garment.  I am using a tweedy double knit called Harrap Tweed from Sirdar.  I don't love it but I didn't want to knit my first jumper with a yarn I really loved incase the jumper didn't work out the way I see it in my head.

This yarn is good, its workable and warm and, if the jumper works out, will be good for dog walks!!  Ah, country life!  And look at the lovely vintage buttons I found in a charity shop.  Perfect for the neck fastening.  I found large and small sizes, I think the larger ones will actually be perfect for the sleeveless fair isle cardigan I've got planned for Mr M.

 And, just in case I get bored of all the above, there is the pressing matter of the baby blanket I am knitting for a little one due early July. Fiona very kindly gave me a pattern off the top of her head when I told her the size blanket I wanted to make and the yarn I wanted to use.  Its driving me mad because I stupidly chose small needles (3.25mm).  I should have gone for 4mm as this Debbie Bliss cashmerino can take it and the blanket would have grown faster!  Anyway, the baby is still in situ and there's still time.

I just hope I'm not still saying that end-June!


Friday, January 1, 2016

The Creative Urge

Happy New Year!!!!

I was going to show you some of the projects I've been working on but there's a bit of a domestic going on between my new computer and my old phone.  They won't talk to one another...hoping one of the kids will come home soon and sort it out!

I woke early this morning, made myself a cup of tea, found a lovely notebook in my stationery stash and settled back into bed to begin my journal for 2016 only to discover something truly depressing.

Not only did the notebook already contain entries for early 2014 AND 2015 but I'd also written pretty much the same thing in those entries as I was about to write today.

On the plus side I used to find keeping a journal helped me make sense of my emotions and experiences but now my creative endeavours help me to process them.

Being creative helps me feel centred, clear-headed and more resilient.

I wish to God I'd known this earlier!!!
copyright Brene Brown

For the last few years I've been choosing a word rather than resolutions.

2014 was Creativity and that was amazing.  I did a fabulous online art-journaling course with Brene Brown that totally opened up my Creative Chakra and allowed me to see myself as a creative person.

*Sadly, that course is no longer available but she is doing a Living Brave Semester if you're interested in exploring what she has to offer.   I've signed up for it and am really looking forward to Living Brave.

I love a project!

*Seems I was wrong!  You can still get it from here.  Have fun.

My word for 2015 was Commitment and it was a great way to keep me on track.  Whether it was a creative project or a personal issue, every time I felt like giving up I would ask myself 'what would commitment look like?'  Amazing answers and solutions often presented themselves in very simple, baby steps.

So, 2016 my word is Courage (the c-word things is just a co-incidence).  Not big lion-wrestling courage but small, quiet, daily courage that continues the journey that the previous years' words help me navigate - a creative path of growth and development.
Choose Courage over Comfort.  Brene Brown
It takes courage to cut fabric and begin a project when the fear of getting it wrong is so great.

It takes courage to show what I'm working on when I judge my abilities.

It takes courage to learn something new when I feel inadequate.

Hello and welcome to 2016 and to Courage.
Make yourself at home but don't get too comfortable, 
we've got work to do! 

Tuesday, December 15, 2015

A touch of Startitis

Heirloom Blanket Section 1
Even though I TOLD myself I'd only knit a couple of rows of my Heirloom Blanket before Christmas.

Even though I SHARED here the project I have planned for the NEW YEAR.

Even though I meant to focus on the 3 hats and 2 pairs of mitts I still have to make for Christmas, I came down with a dose of Startitis.

For me the first symptoms are a rumbling in the tummy.  A kind of excited bubbly feeling that I call 'the Christmas feeling' (which can take hold at any time of year).

Then fingers start to itch and a strange restless energy takes over.  I find myself desperately wanting to get organized; photocopying patterns, gathering yarn, sorting out files, needles and setting up a 'project bag' (more on those another time).

Once the virus takes hold I can do nothing but surrender to the creative process - casting on stitches and happily playing with the new yarn, feeling how it works on the needles, enjoying the movement of the fabric being created and absorbing the colours in the yarn.

Don't touch - highly infectious waistcoat yarn!
This time, however, I think I've managed to get on top of it before it wreaked havoc.  I did a little sorting of yarn for Mr M's waistcoat before I rallied.

I've still got the tail-end of a section of heirloom blanket but once this bit is done I should be well and truly back on track with hats and mitts.

This little dose was very yarn related...but I am also susceptible to the fabric and needlework startitis strain too.

I'm mindful that there's always a lot of Startitis around at this time of year and aim to keep myself strong by maintaining a healthy focus on the work in hand.

A couple of post-Christmas days quietly working on new projects should have me feeling much better.

Thursday, December 10, 2015

A healthy addiction?

Its not often you walk into a Chinese restaurant and get transfixed by a knitted tank top!

Its official.  I am addicted to Fair Isle and Colour Strand knitting.

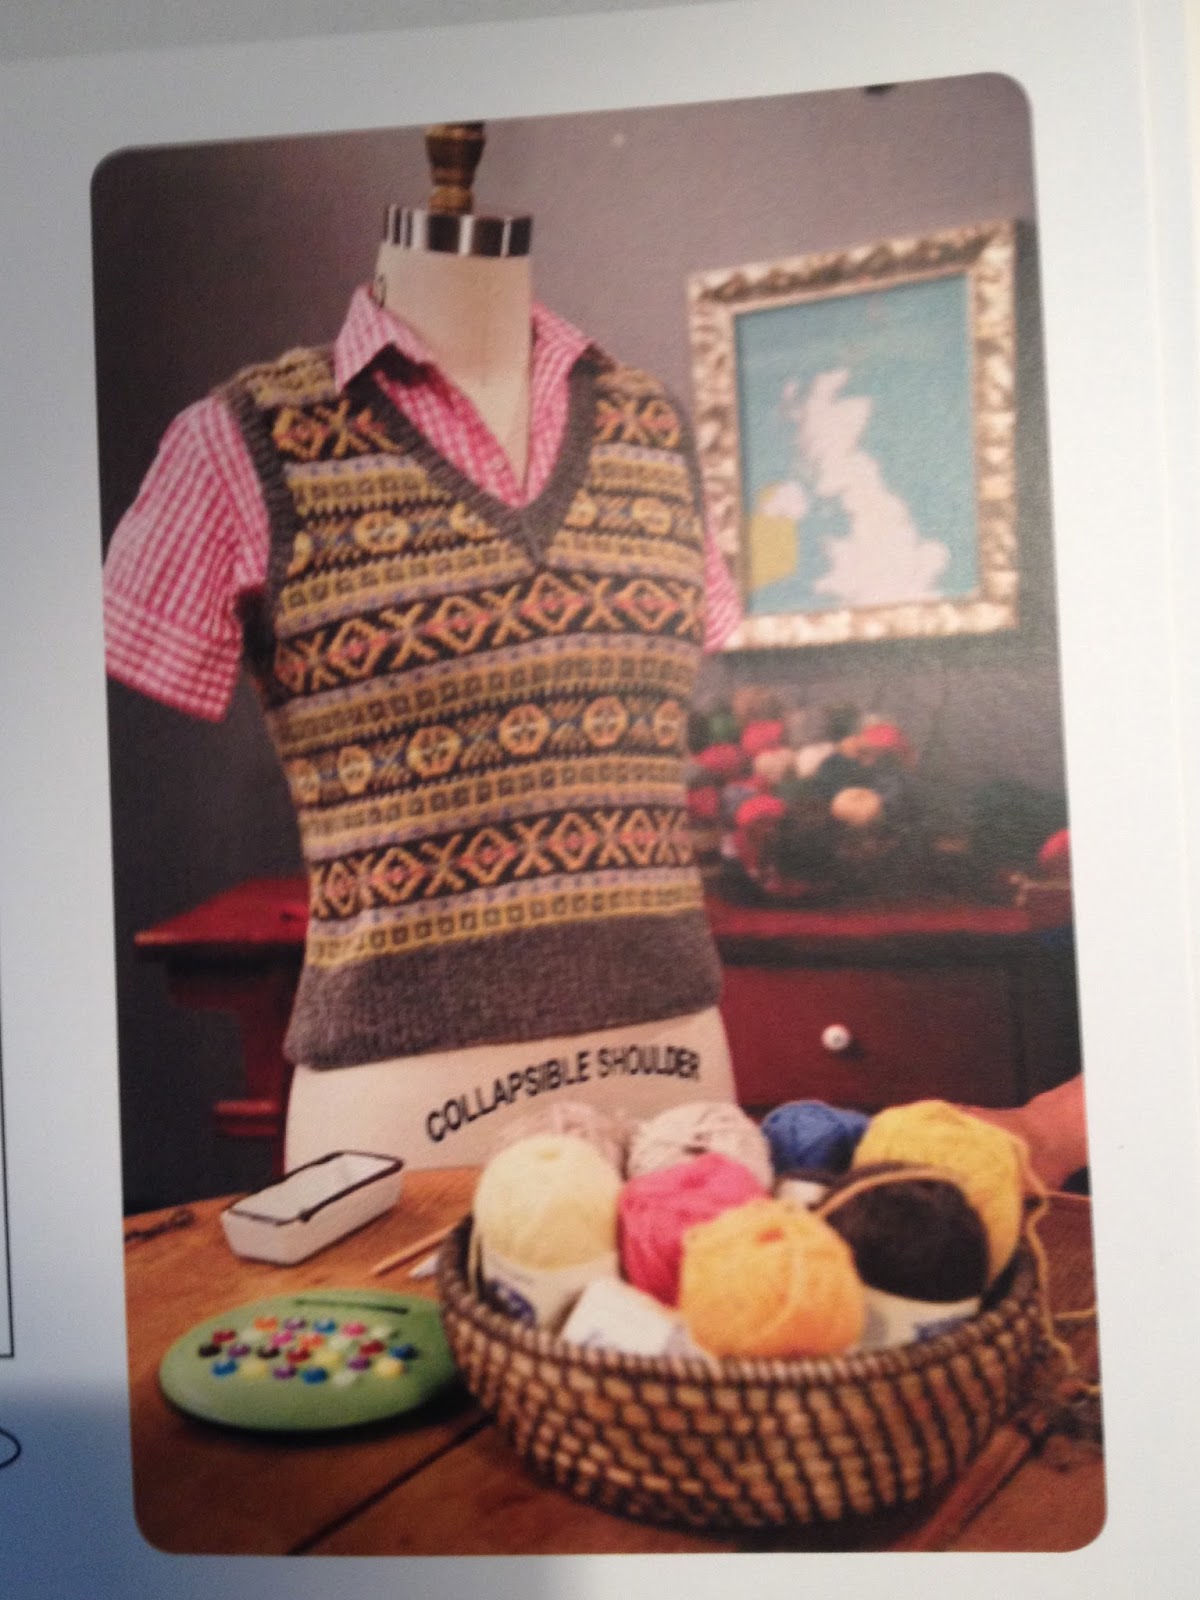
I spotted a young man in said restaurant wearing this and had to ask him if he would mind if I took a photo!  

He was very obliging and told me his grandmother had made it for him and that he would pass on my admiring comments.  What a good sport.

His girlfriend was also wearing another GrannyKnit tank top but I was laughing so much I only managed to photograph the table!?

I have three Fair Isle projects on the go right now.  I'm on pair no 3 of the mitts I've mentioned. The problem is that with each pair my technique improves and the previous pair end up the dog-walking glove basket!

I'm hoping my standard gets good enough so that some will end up in the Christmas-present basket!

My first ever attempt at Fair Isle was earlier this year making this hat with a great teacher, Fiona Morris, at a class in my local yarn store.  I'm so proud of that hat, even though now I've had more practice, I can see all my mistakes and am a little embarrassed about the shape.  Still, it works and I made it.

Heirloom Blanket 2016
Now I am motoring on and have joined designer, Marie Wallin's, Fair Isle Club.  Each month she sends out a pattern and, armed with the right colour combination of yarns (lovely Felted Tweed from Rowan), we are to knit a 'sample'.  Eventually all the samples will be joined together, edged with ribbing and, as Mr M commented, an heirloom blanket will exist.

January's project
Talking of Mr M.  He's been so intrigued by my immersion in Fair Isle and interested in the creative process (especially as I've been borrowing his computer to watch videos and download tutorials as my ancient machine won't play along), that I asked him if he would like me to knit him a jumper?

And, reader, he said yes!

I know I know, I'm supposed to be making one for me first.....but I had signed up for this class and thought he might like a version of it.

I like the colours but want to knit it as a waistcoat and also make it longer...and if it doesn't fit him, well I could wear it!

I've just ordered the yarn and will start this project in January.

Looks like I'm losing the battle against the reducing the wool stash!


Saturday, December 5, 2015

Practical Solutions - Bias Binding

Want to create nearly 100 inches of bias binding from just a 10 inch square of fabric?  Read on my friend (and sorry for the crappy photos!)
Jessie Chorley's altered books

I hate wasting fabric and am always looking for wise ways of using offcuts.

Of course, quilting was the traditional way of making the best use of small pieces of fabric and I have also been inspired by the likes of Jessie Chorley, Janet Clare and Mrs Bertimus who do amazing things using applique, mixed media and found objects.

And whilst these creative persuits are all on my list of things to explore further, I'm a sucker for a bit of practical creativity.

So, when I discovered a way of using a small bit of fabric to create bias binding....well, I was off!

2 x 10" squares
Sew straight edge, rights sides tog
I had some lovely bits of Liberty Tana Lawn hanging around so cut 2 x 10" squares.

Then cut them in half diagonally and with right sides facing sewed the bottom edge to create two parallelograms.


Draw 1" lines - 
I drew 1" lines on wrong side of fabric, lengthwise, and made them line up so that they were actually creating a spiral.


Sewed a 1/4" seam with right sides together to make a kind of uneven tube.

Then I cut along the line, remembering to cut the fabric as a continuous ribbon.

I ended up with about 2 metres of bias binding.  I just ironed mine in half as my little binding gadget in the photo was for a much wider cut of fabric...

(Perhaps Santa might put a 1/2" bias binding maker in my stocking this Christmas?)


Friday, December 4, 2015

Stitch and mitts

@mjmucklestone

In anticipation of the cardigan I going to knit, I need to build up my skills. To relieve the perfectionist pressure I am putting on myself I've taken the advice of brilliant knitting guru Karen Templer and put myself in training for the Big Knit by making hats and fingerless mitts.

Karen says that once you've learnt the fingerless mitt with a thumb gusset you're pretty much halfway to a cardigan, and she sings the praises of this pattern: the Muckle Mitt from Mary Jane Mucklestone (check out her website for gorgeous Fair Isle patterns).

See the cute thumb gusset?
Using up odds and ends

I'm on my second pair already and Karen is right, they're great fun to make; plus they're a great way to use up left-over bits of yarn, thereby helping me clear my 'stash' and the possibilities for patterns and colour combinations seem endless!

Also, alongside making cosy mitts as gifts, I finally get to be a person who can wield four needles and two yarns of wool at the same time!   I used to think that this was some kind of Dark Art of Knitting - and now I've mastered it, its a deeply satisfying, highly creative and fun way to knit.

Socks may move up the knitting leader board yet!


Wednesday, December 2, 2015

Sew Ho Ho

When our children were born Stella, a friend of my mother-in-law's, would make them a Christmas stocking.  At this point I should post a cosy fireside picture but that would require me going up into the attic, opening up the Christmas decs bag and, quite frankly, its too early in December.

Plus I might be a bit scared there's a mouse up there.

Anyway, needless to say, now I am a Granny with a mild obsession with making stuff, I feel that our Little Love should have her own stocking, too.  

Ho ho ho
I'm not saying I can compete with Stella's amazing efforts but I felt inspired to give it a go after I found some lovely Christmas fabric during a browse around the Eternal Maker and an online tutorial here.

I'd love to be able to show some elegant, Instagram-lifestyle, Pinterest-ready version of how things turned out.  

But, as I may have alluded to before, there often seems to be a mis-match between what I imagine in my head and what I end up making.


No no no!

I mean, I KNOW how to do applique, for crying out loud.   

I've also watched tutorials, downloaded (and even read) a great little instruction e-book and practiced many plenty of times.  

However....  this was baaad.


I need to remember that the whole reason for the blog being named Fashionably Slow is to celebrate the creative process and to honour the time it takes to make things from scratch.   The problem is I get so excited about starting something new that I rush in and mess up.

Things I have learnt from my mistakes: the secret to Applique is to make sure you stabilise the front fabric with some iron-on vilene, and the back with stitch and tear paper.   Practice on scrap fabric first.  AND SLOW DOWN. 

Plenty of room for pressies.
I always underestimate how long its going to take to make something.  I always think that I can just 'run something up' on my sewing machine.  

This was just one of the things on my list to make today and it took me hours!  

I reckon the next one will be easier, though!


Sunday, November 29, 2015

Oooh saucy!

Learning to make my own clothes is making me much more aware of my body and I'm starting to think about not just the kind of clothes I want to wear but the kind of shape I want to be in.  

the great news is that sewing is great for appetite control!  I start sewing and completely forget about food.  Hours can go by before I realise I haven't eaten.  

Then when I stop I suddenly realise I'm starving.  Let me introduce my Emergency Blood-Sugar Crash Prevention dish:  Avocado on toast with Pistachio Dukkah and Chimichurri Sauce.

Avocados are now almost permanently in residence in my tea towel draw.  They hang out there until ripe then get moved to the fridge to slow the process down, so I usually have one ready to eat in a hurry.

Dukkah is a lovely Egyptian condiment made from roasted pistachios, sesame seeds and spices that gives a delicious punch and crunch.


Pistachio Dukkah

50g Pistachios                       
1 Tbsp sesame seeds
1Tbsp pumpkin seeds
2 tsp coriander seeds           
2 tsp cumin seeds
1 tsp fennel seeds
1 tsp smoked paprika
pinch salt
pinch chilli flakes (optional) 

Toast pistachios, sesame and pumpkin seeds in dry frying pan until golden.  Pour onto plate to cool.

Toast coriander, cumin and fennel until fragrant.  Add to plate to cool.          

Blitz in spice grinder with salt, paprika and optional chilli to desired texture. 

South American Chimichurri sauce is AMAZING.  I use it on baked sweet potatoes, in noodle dishes, on fish and chicken but I think it sings the sweetest song with avocados.

Chimichurri Sauce

Small punch of coriander and/or parsley
1/2 tsp oregano (dried or fresh)
2 cloves garlic
1/2 tsp chilli flakes/fresh chilli
21/2 Tbsp olive oil
1/2 lemon juice
2 tsp red wine/white balsamic vinegar.

Blitz together and keep in jar in fridge. You can add more or less herbs etc and balance out the flavour according to your own taste.  I like a touch of balsamic vinegar for sweetness. Spread on avocados then sprinkle with dukkah.

Ofcourse, if you need a little sweet fix and want to avoid sugar there's always the Deliciously Ella chocolate chia cookies, or Honestly Healthy's gooey vegan brownies!

They certainly hit the spot and stop the sugar craving.

Waistline, is that you?

Long time no see!


Saturday, November 28, 2015

Its beginning to feel a lot like Christmas

Back in June my fantasy of having lots of hand knitted presents to give at Christmas seemed like a great idea and easily achievable.

It also felt a bit daft.  After all there were still 6 months to go and it was early summer.  People might think I'm crazy (or crazier).

And I didn't really feel motivated to start.

Now its late November and my plan for socks, hats, hand warmers and hot waterbottle covers galore is hopelessly behind.

I've ditched the sock plan anyway.  Is it me or are socks just really boring to make?  Maybe I need to have another go.

I'm quite tempted by the 'knitting two socks at the same time' technique.  For a start I think I'd enjoy the technical challenge and also it means I would avoid the dreaded One Sock Malaise.  Although only making one sock probably wouldn't matter in this house - the attitude amongst The Young seems to be 'the odder the better'.

Anyway, socks are off the menu this year.  So are hot waterbottle covers.  I've completed two but I have to confess that the second item gave me a touch of One Sock Malaise; once I'd done one side repeating it just didn't appeal.

Hence .....

Ta dah!
Whatever
This creative journey is revealing how low my boredom threshold is!

Baby hat knitted in the round.
Now hats are great - so many shapes and sizes and quick to do.

My problem is that to reduce the monumental stash of wool in my cupboard I'm trying to match the wool I have with the patterns I want to knit.  In order to do this successfully and not end up making things that come out the wrong size I need to unravel (see what I did there???) one of the great mysteries of knitting.

Gauge.

That means making a sample square of knitting to establish the right amount of stitches per inch on the 'fabric'.  If your sample matches the pattern requirement, you're good to go.

Everything I've read so far tells me 'gauge' is crucial and that I ignore it at my peril.  I know I have to master it, but it requires a level of maturity that I haven't arrived at yet.  I still enjoy diving in and making mistakes - then scouring the amazing online resources like here to help problem solve.

I like learning this way for now as the items I'm knitting are usually pretty small and the mistakes are easily sorted. But I do want to knit myself a jumper/cardigan as part of my capsule wardrobe and bought a beautiful pattern from the Amercian company  Brooklyn Tweed.  I can't understand a word of it at the moment and I don't want to end up making something I can't wear so mastering gauge and getting the yarn & needle size right will be a vital first step.

By the way, if you want to learn to knit and make cool, fab stuff (I do, I do!) - this blog is brilliant.  I am hoping if I read enough of it and keep practicing I can hang out with the cool kids.

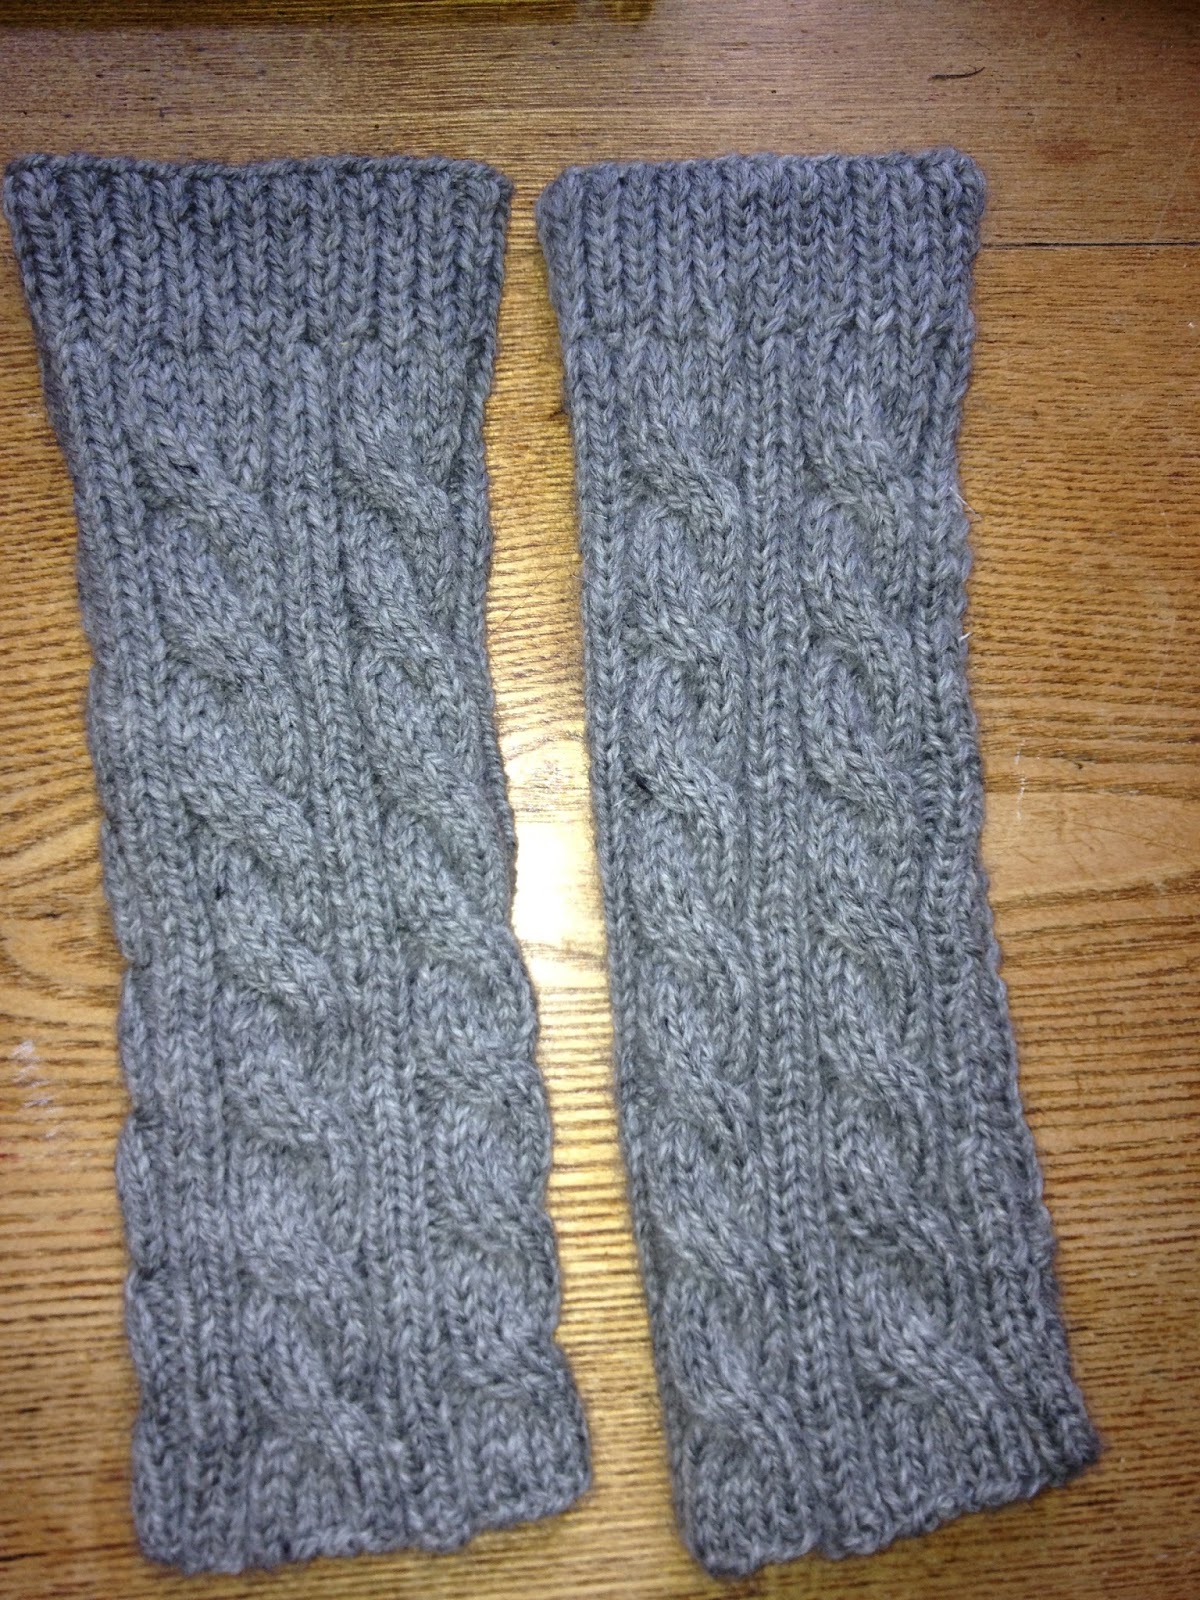
Mastering Cable stitch on Handwarmer
Meantime, at the foothils of my knitting journey are handwarmers.

Quick to make, loads of different designs and even though, like the socks and hot waterbottle covers,  there is the 'second one' to make, somehow it doesn't seem to matter.

They are a great way to practice new stitches and techniques.  I've  finally got the hang of that lovely wavy pattern that was the mysterious Cable!

On the next pair I want to up my technical challenge and make Fair Isle mits with a thumb gusset.......

It may be a Happy Christmas 2016 for  someone!

PS Having just read the hilarious Yarnharlot's blog about being Christmas ready, I'm feeling a bit better about my state of affairs.  Its good to know I'm not alone!


Friday, November 27, 2015

Growing Roots

As I was pulling these babies out of the soil this evening I realised that I have as much to learn about growing stuff as I do about making stuff and intend to celebrate the small gardening successes I've achieved.  (Although to be honest, the beetroots were Mr M's project).

This was our first year growing beetroot.  They are such a generous little plant.  From tiny seeds we were able to harvest the leaves all summer to add to our smoothies and salads.  Now its late November and although the beetroots are small (probably because we didn't 'thin' them out and give them enough space of their own) they are packed full of nutrients and flavour.  I read that eating two raw beetroot a day will help lower blood pressure.


I've also been reading about natural dyes and quite fancy using beetroot at some point to dye some yarn!  But I'll wait a while on that - maybe with next year's harvest?  

I'm being quite strict with myself about buying yarn at the moment but I do have my eye on some  I'd like to use in future projects.  One is using the plant-dyed wool from Elisabeth Beverly.    Elisabeth has combined her passion for wild flowers and plants, and knitting with natural fibres, to develop a gorgeous range of cashmere and merino 

I met Elisabeth a year ago at a local yarn festival and was sorely tempted to buy some skeins of cashmere dyed in the most beautiful, delicate hues.  I promised myself that I would work on my skills to justify buying such luxurious yarn.  And even though socks are not my thing at the moment  - I quite fancy knitting my mum some cashmere socks as a treat. 

In the meantime I'm super excited about the fingerless mittens pattern I've just downloaded PLUS I haven't even told you about my Fair Isle Club blanket project! 


No time now - I'm off to try this recipe sent by Daughter K from her yoga retreat.  Going to combine it with some sweet potato chips, cashew mayonaise and roasted chilli & cumin broccoli! 

Slow Food.  

Yum.
 
Beetroot, Avocado and Coriander Salad

Grate 1-2 whole beetroot, finely chop 1-2 cups of fresh coriander.  Mix in some olive oil, apple cider vinegar or lemon juice, dulse and kelp powder (these are optional seaweeds and it can be made without).  Then add 1 teaspoon of tamari or good quality soy sauce, minced garlic and spirulina powder (also optional).  Stir it all together and mix  it up well and then add one diced avocado, mix again.  Eat and enjoy!  Instead of coriander, you can also use basil, rocket, baby greens, anything goes!